HubSpot’s Free Professional Signature Generator:
Hello Readers! Today we’re going to discuss about a tool that will take your professional image to a whole new level i.e Free Hubspot Professional Signature for Email. Whenever you email a brand, company, or client, their first impression of you comes from your email. And the most important part of an email is its signature.
Today, we’ll understand in detail how you can create an attractive, professional Gmail signature in minutes using HubSpot’s FREE Email Signature Generator. This tutorial is especially for entrepreneurs, content creators, freelancers, and small business owners.
Why a Professional Email Signature is Important in this digital era ?
Imagine someone emails you, and at the bottom, it just says “Sent from my iPhone.” It looks a bit unprofessional, doesn’t it? A professional signature makes you look credible. It includes:
- Name aur Designation
- Company/Channel ka Logo
- Contact Number
- Website/Social Media Links
- Professional Photo (optional)
Everything is displayed together. This strengthens your brand identity and provides an easy way for people to connect with you.
Step-by-Step Guide
How to use the HubSpot email signature generator?
Step 1: Visit the website
First, click on this link – https://www.hubspot.com/email-signature-generator or go directly to the HubSpot email signature generator page. This tool is completely FREE; you don’t need to make any payment.
Step 2: Choose a Template
On the left side of the screen, you will see 6-7 stylish templates. You can choose any of them according to your taste and needs. Want a simple design? Template #1 is perfect. A slightly more modern look? Try Template #3 or #4.
Pro Tip: You can remove the “Created with HubSpot” tag. This makes the signature look completely your own.
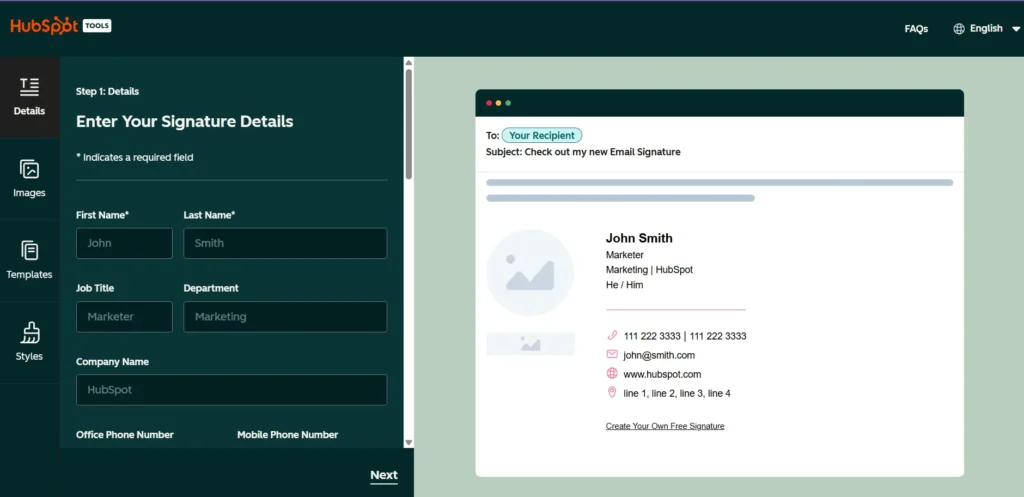
Step 3: Fill in Your Details
Now, in the next section, you need to fill in your personal and professional details:
- Full Name
- Job Title (Designation, Youtube Creator, Founder, Consultant, etc.)
- Company/Channel Name
- Phone Number
- Email Address
- Website URL (your channel, blog, or website link)
This is the information that will appear in your signature. Fill it carefully to avoid any mistakes.
Step 4: Stylize Your Signature
Now comes the fun part – customization!
- Theme Color: You can choose your brand or favorite color.
- Text Color: Ensure that the text is easily readable.
- Font aur Font Size: Professional fonts like Arial, Helvetica, or Georgia work well.
Experiment, but don’t make the signature too flashy. Maintain a clean and professional look.
Step 5: Add an Image/Logo (Optional but Recommended)
Do you want to add your professional headshot or company logo? Then this step is for you.
- Upload your photo or logo to Google Drive or Dropbox.
- Change the file’s sharing settings from “Restricted” to “Anyone with the link.”
- Copy the shareable link.
- Paste the link into the image section of HubSpot.
- Your photo will now appear in the signature, adding a personal touch and building trust.
Step 6: Add a Call-to-Action (CTA) Button
Do you want people to watch your latest video, visit your website, or check out a specific offer? A Call-to-Action button is perfect for this.
Step 7: Create and Copy Your Signature
Once everything is set, click on the “Create Signature” button. Some basic information (like company size) might be requested, and then your signature will be ready!
Now you will have 3 options:
- Copy Signature (direct HTML copy)
- Copy Source Code (advanced option)
- Email to Colleagues
For us, the “Copy Signature” option is the one we need.
How to Set Your Signature in Gmail? (Final Step)
- Open Gmail and click on the gear icon (Settings) in the top-right corner.
- Select “See all settings.”
- In the General tab, scroll down.
- Go to the Signature section.
- Click “Create New” and name your signature (e.g., My Professional Signature).
- Paste the HTML copied from HubSpot into the signature box.
- Scroll to the bottom and click “Save Changes.”
Congratulations! Your new professional signature is now live. From now on, this attractive signature will be automatically added to the end of every email.
What About Future Updates?
If your phone number changes, your designation is upgraded, or you get a new logo – no problem! Simply go back to the HubSpot generator, create a new signature with the new details, and replace it in Gmail. It’s that easy!
Final Thoughts
This is a valuable tool from Startup Wise that literally boosts your professional image in 5-10 minutes. Especially when you work with brands, a polished signature shows your seriousness. If you’re an entrepreneur, content creator, or work in any professional field, this small investment of time will prove very beneficial for you.
Click on the link provided above, try it out and let us know your experience in the comments! Thanks for reading, guys! Until the next blog, all the best with your new professional signature!
Read our useful AI video creation tool – https://edutechskills.co.in/google-vids-effortless-video-creation-tool/