How to Use Google Calendar: Boost Productivity with These 24 Hacks in 2023

Do you want to enhance your productivity in 2023? Google Calendar offers a range of useful tricks and shortcuts to help you stay organized and manage your time effectively. However, are you aware of all its features? Discover these 24 Google Calendar hacks that can elevate your productivity in 2023!
Learning how to utilize Google Calendar’s extensive features can revolutionize the way you manage your time, increase your organizational skills, and ultimately boost your productivity.
Type www.calendar.google.com and open Google Calendar then follow these steps to know its features.
1. Shortcut to Create a New Event
Save time by utilizing this handy shortcut to quickly add a new event. Instead of manually opening Google Calendar and creating events, follow these steps:
- Open your browser.
- In the browser search bar, type “cal.new” and hit Enter.
2. Create a Default Reminder Time
Avoid the hassle of manually adding reminders every time you create a new event. By setting default reminders, they will automatically be added to all your new events. Here’s how to do it:
- Go to your Calendar Homepage.
- Click the gear icon located in the top right-hand corner and select Settings.
- In the Settings menu, go to “Settings For My Calendars” on the left-hand side and click on your calendar.
- Scroll down to Event Notifications and click on “Add Notification.”
- Choose the desired number of minutes/hours/days for your reminders.
- You can add multiple reminders. For instance, you may choose to be reminded 10 minutes, 1 hour, and 1 day before events.
Now, whenever you create an event, these default reminders will be automatically added.
3. Add a Secondary Time Zone
If you frequently work with different time zones, Google Calendar allows you to set a secondary time zone. Here’s how:
- Go to the General tab in Settings.
- Select Time Zone and check “Display Secondary Time Zone.”
- Choose your desired secondary time zone from the dropdown menu.
- Optionally, you can add a label to each time zone.
For example, if you reside in the UK but attend webinars and virtual events in the USA, you can set your primary time zone to UK time and the secondary time zone to New York/Eastern Time.
4. Perform an Advanced Calendar Search
Ever had trouble locating or modifying an event because you couldn’t recall its specific date or time? Google Calendar’s advanced search filters can solve this problem. Follow these steps to find any event, past or future, within seconds:
- On the Calendar Homepage, click on the magnifying glass icon located in the top right-hand corner to access the search bar.
- Click the dropdown arrow to display the advanced search filters.
- Include any information you remember about the event, such as keywords, location, and/or date.
- Click on “Search.”
Pro Tip: Use event titles with relevant keywords to quickly locate them later using this search option.
5. Drag and Drop Events
Changing the date or time of an event is effortless with the drag and drop feature. Simply select the calendar entry and move it to the new date and time. No need to manually edit the event details.
6. Adjust Event Length by Dragging
You can easily modify the duration of an event by clicking on the bottom of the event, holding, and dragging it up or down to make it longer or shorter.
7. Create Multiple Calendars and Color-Code Them
Managing various aspects of your life can become overwhelming when everything is on a single calendar. To avoid clutter and confusion, create separate calendars for different areas of your life and assign distinct colors to each.
8. Create Multiple Calendars and Color-Code Them
If you’re like most people, managing different aspects of your life can be challenging, and having everything on one calendar can become cluttered and confusing. The solution? Create separate calendars for each area of your life and color-code them.
For example, you can have a calendar for work, a calendar for personal events, and a calendar for your kids’ activities. Assign a different color to each calendar so you can easily identify and understand what each event relates to at a glance.
You can quickly toggle each calendar on and off in the left-hand menu on desktop or the hamburger menu in the top left corner in the mobile app.
9. Change Your Calendar View
Google Calendar offers various options to change your calendar view. On desktop, you can find these options in the top right-hand corner, and in the mobile app, they are available in the hamburger menu at the top left.
You can choose from Day, Week, Month, Year, and Schedule/Agenda views. For instance, if you select the “Day” view, you will only see what you have scheduled for that specific day, rather than viewing all your upcoming events for the week or month.
You also have the flexibility to hide or display weekends and set up a custom calendar view.
10. Set a Custom Calendar View
In addition to the default Day, Week, Month, Year, and Schedule/Agenda views, you can create a custom calendar view ranging from 2-7 days or 2-4 weeks.
Follow these steps to set up a custom calendar view:
- On the Calendar Homepage, click on the gear icon in the top right-hand corner and select Settings.
- Go to General > View Options in the settings menu.
- Click the dropdown menu arrow to choose your preferred custom view.
- Return to your Calendar Homepage and select the custom calendar view from the dropdown menu in the top right-hand corner.
11. Agenda View
Agenda View, also known as Schedule View, provides an overview of all your upcoming events and tasks, along with a sense of your progress throughout the day.
To access the Agenda View, click on the dropdown menu in the top right-hand corner and select “Agenda” or “Schedule.” This will display all your upcoming events as a simple list.
12. Receive a Daily Agenda Email
Imagine receiving your daily schedule in your email inbox each morning. With Google Calendar, you can make it a reality. Simply enable the “Email for Daily Agenda” feature, and Google Calendar will automatically send you an email every morning with a list of events and appointments scheduled for the day.
Follow these steps to enable the feature:
- Go to Settings and select “Settings for My Calendars.”
- Choose the calendar for which you want to receive notifications.
- Under “Other Notifications,” select “Email” next to “Daily Agenda.”
13. Change the Starting Day of the Week
If you prefer your week to start on a Sunday or a Monday, you can customize it in your Google Calendar settings.
Here’s how:
- Go to Settings > General.
- Select “View Options.”
- Click on the dropdown box labeled “Start Week On” and choose the desired starting day of the week for your calendar.
14. Share Your Google Calendar with Others
Sharing your Google Calendar with others can be extremely useful in many situations. For example, you may want to share your calendar with your assistant, partner, or older kids. This allows them to see your schedule and know when you’re available or busy.
Follow these steps to share your calendar:
- Go to Settings and select “Settings for My Calendars.”
- Choose the calendar you want to share and add the email addresses of the people you wish to share it with.
- Use the dropdown menu to adjust their permission settings.
- Click “Send.”
- The recipient will receive an email with a link to add the calendar to their list.
15. Download the Google Calendar App for Your Phone
Ensure you have the Google Calendar App downloaded on your phone to conveniently access your calendar on the go and receive reminder notifications. It’s recommended to use the Google Calendar App instead of your phone’s default calendar app due to its superior features and functionality.
By having easy access to your Google Calendar while you’re out and about, you can quickly schedule appointments without having to wait until you’re back in front of your computer. This eliminates the need to send follow-up emails or text messages to confirm details.
16. Encourage Your Partner to Use Google Calendar
Persuade your partner or significant other to utilize Google Calendar and share calendars with each other. This allows for seamless coordination and arrangement-making without the need to constantly check each other’s availability.
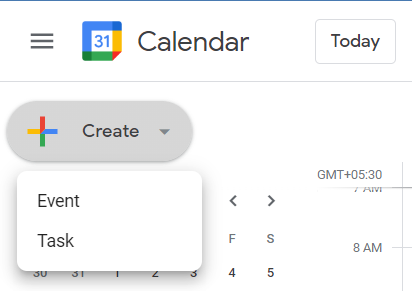
17. Add Tasks
Google Calendar can also serve as your task manager alongside events and appointments. You can easily add tasks by following the same process as adding an event, but selecting “Task” instead.
To display tasks on your calendar, enable the tasks feature in the My Calendars section on the left-hand side or in the app’s hamburger menu. Once you’ve completed a task, mark it as done by clicking on it and selecting “Mark Completed.”
18. Add National Holidays to Google Calendar
Stay informed about public holidays and significant national events by adding them to your Google Calendar. Go to the “Other Calendars” section in the left-hand menu, click the “+” symbol, and select “Browse Calendars Of Interest.”
You can choose to add National Holidays, Religious Holidays, sports events, phases of the moon, and even a Birthdays Of Your Contacts calendar to ensure you never miss an important occasion.
19. Hide Calendars and Tasks
If your calendar becomes cluttered with multiple color-coded calendars, tasks, and shared calendars, you can easily manage the visibility of each to avoid distractions and overwhelm.
For instance, you can turn off your work calendar when you’re not working and vice versa. Simply toggle the various calendars on and off in the left-hand menu on desktop or in the hamburger menu in the app.
20. Learn Keyboard Shortcuts
Google Calendar offers practical keyboard shortcuts that save time and enhance productivity. Take advantage of the following shortcuts while using your calendar:
- Create event: c
- Quick add: q
- Event details: e (click on the event first)
- Delete event: Backspace or Delete (click on the event first)
- Go to previous time period: p
- Go to next time period: n
- Go to today’s view: t
- Day view: d
- Week view: w
- Month view: m
- Custom view: x
- Agenda view: a
- Search: /
- Print: Ctrl + p or Command + p
- Settings: s
21. Add a Specific Meeting Location
Did you know you can add a specific location to your events? When editing an event, include the precise meeting location.
Moreover, when it’s time to head to the meeting, you can simply tap on the event in the Google Calendar App on your phone. Tapping on the location will directly link to your maps app, enabling you to get directions with just a few clicks. No more last-minute scrambling to find an address buried in old emails or text messages!
22. Add Attachments
Enhance your Google Calendar events by attaching relevant documents. For instance, you can attach meeting agendas to respective calendar entries or include timetables and lists of seminars/speakers for conferences.
The convenience doesn’t end there! You can attach documents to calendar entries on your desktop computer and access them seamlessly through the Google Calendar App on your phone. This eliminates the need to print numerous documents beforehand, keeping everything in one easily accessible location.
To add an attachment, simply click on the paper clip icon within the event’s description and upload the appropriate file.
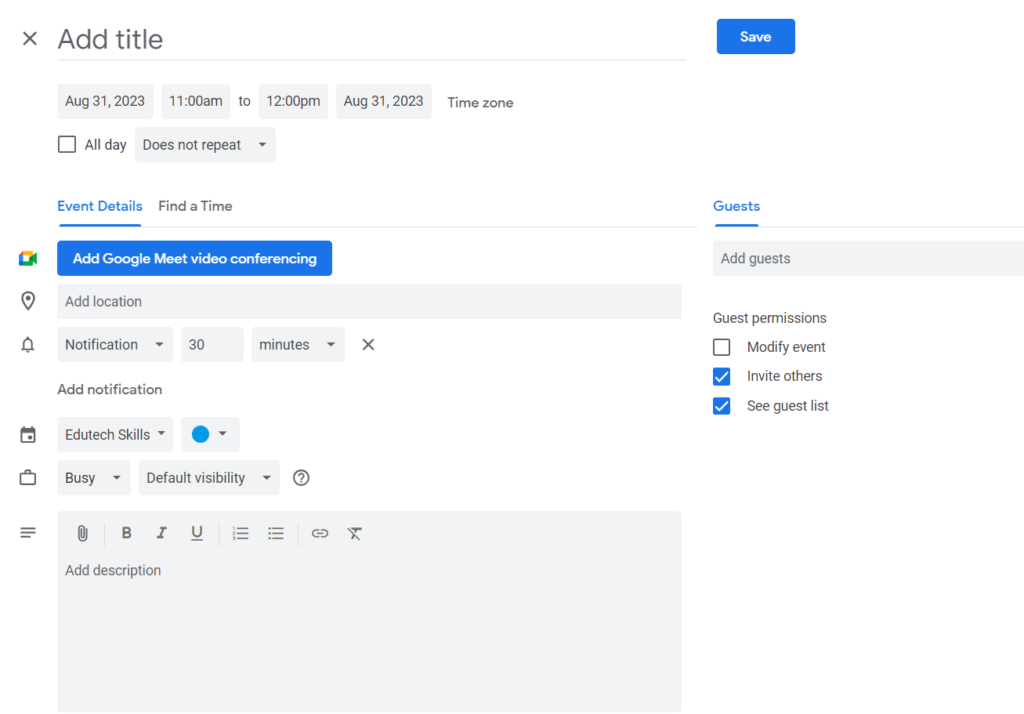
23. Set up Recurring Events
Streamline your scheduling process by setting up recurring events for tasks or activities that happen regularly, such as weekly or monthly occurrences.
When creating the event for the first time, select the dropdown menu that initially says “Doesn’t Repeat.” This will present you with various options to choose from.
If you don’t find the desired option listed, select “Custom” to create your own custom schedule. This feature also allows you to specify when the recurring event ends, either on a specific future date or after a certain number of occurrences.
Utilizing this feature saves you from the hassle of repeatedly entering the same information.
24. Restore Deleted Events
Accidentally deleted an event? No need to worry! You can easily restore deleted events by following a simple process.
Click on the gear icon and select “Trash/Bin.” This will take you to the list of recently deleted events. Simply check the box next to the event you want to restore and click the arrow icon above the list. The deleted item will be instantly placed back on your calendar.
25. Use Google Calendar for Everything!
Here’s the ultimate hack: Make it a habit to use Google Calendar for all your events, meetings, and appointments. The more you rely on it, the more beneficial it becomes in terms of productivity and organization. Remember the golden rule: If it’s not in the calendar, it’s not happening!
By incorporating Google Calendar as your go-to scheduling tool, you’ll experience improved efficiency, better time management, and a centralized platform to keep track of your commitments. Embrace the power of Google Calendar to stay on top of your busy life.

1 thought on “Google Calendar 24 Hacks – Use like a pro”